本帖最后由 属于你的雨天 于 2023-11-1 15:02 编辑
功能介绍
一分钟快速上手
核心实现逻辑是在update中,时刻检测,跟随主体与跟随对象的距离,然后动态修改跟随对象的位置来实现的
this._timestamp = Date.now();

            if (this._curCharacter && this._petTarget && Vector.squaredDistance(this._curCharacter.worldTransform.position, this._petTarget.worldTransform.position) > 40000) {

                if (!this._moveAnima.isPlaying) {

                    this._moveAnima.loop = 0;

                    this._moveAnima.play();

                }

                let dis = Vector.squaredDistance(this._curCharacter.worldTransform.position, this._petTarget.worldTransform.position)


                // 使用moveto

                // Navigation.navigateTo(this._petTarget, this._curCharacter.worldTransform.position, 50, () => {

                //     this._moveAnima.loop = 1;

                //     this._moveAnima.stop();

                // });


                Navigation.follow(this._petTarget, this._curCharacter, 50, () => {

                    this._moveAnima.loop = 1;

                    this._moveAnima.stop();

                });


                // 自己计算

                // let dir = this._curCharacter.worldTransform.position.subtract(this._petTarget.worldTransform.position);

                // this._petTarget.movementAxisDirection = dir;

                // this._petTarget.movementDirection = mw.MovementDirection.AxisDirection;

                // this._petTarget.addMovement(dir);

                // if (dis <= 2500) {

                //     this._moveAnima.loop = 1;

                //     this._moveAnima.stop();

                // }

            } else {

                if (this._moveAnima) {

                    this._moveAnima.loop = 1;

                    this._moveAnima.stop();

                }

            }


// 追加 027的更新 其中核心是 宠物的创建方式的修改


/**创建宠物 */

    public async createPet(): Promise<void> {

        await checkAssetCanUes("NPC");

        // 创建Pet

        let petTarget: mw.Character = await SpawnManager.spawn<mw.Character>({ guid: "NPC", replicates: false })

        petTarget.collisionWithOtherCharacterEnabled = false;

        // petTarget.animationMode = mw.AnimationMode.Custom;

        // petTarget.characterType = mw.AppearanceType.FourFootStandard;


        // 修改头顶UI位置

        let headUI = petTarget.overheadUI;

        let newLoc = headUI.worldTransform.position.clone();

        newLoc.z -= 70;

        headUI.worldTransform.position = newLoc;


        // 初始化形象

        // let fourFootStandard: mw.FourFootStandard = petTarget.setDescription(mw.FourFootStandard);

        await checkAssetCanUes("159609");

        petTarget.description.base.wholeBody = "159609";

        // 加载移动动画

        await checkAssetCanUes("150782");

        this._moveAnima = PlayerManagerExtesion.loadAnimationExtesion(petTarget, "150782", false)


        // 设置默认位置

        let _curCharacterLoc = Player.localPlayer.character.worldTransform.position;

        _curCharacterLoc.x += 300;

        petTarget.worldTransform.position = _curCharacterLoc;


        this._petTarget = petTarget;

    }
其中 有 两套实现方案 ;
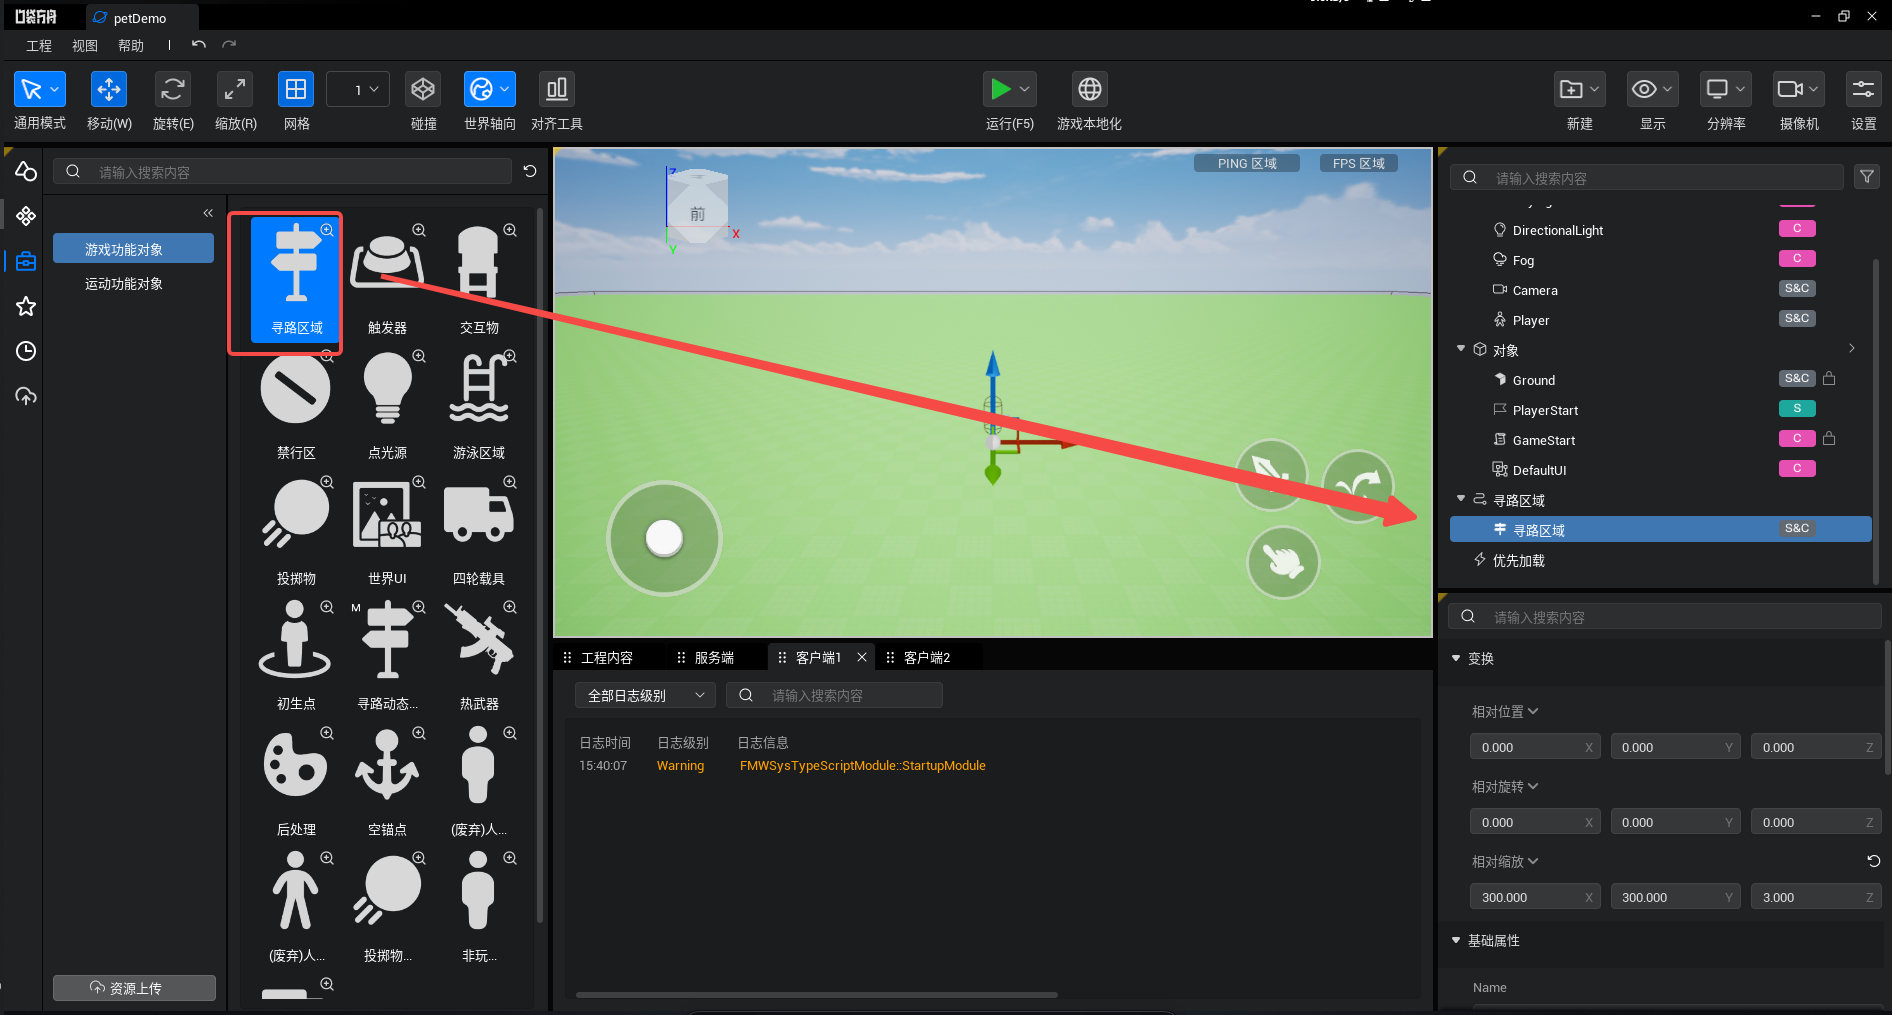
1. 若是追求简单 直接使用 框架中的 Navigation.follow , 但是 必须在游戏场景中 添加寻路区域
2. 使用 游戏对象的 addMoveInput
补充:
由于框架完善这方面的需求 添加一个更加方便的AIP 可以直接使用跟随 且不用 在update中循环调用 但必须添加寻路区域 如下图:
#########################################
进阶方向- 宠物 可以绑定触发器 实现与宠物的交互逻辑
- 宠物 的多端同步
- 宠物推荐单端创建 同步多端 这这样可以减少性能消耗
 petDemo.7z
(59.17 KB, 下载次数: 475)
| 