本帖最后由 叽里咕噜小胡桃 于 2023-11-22 15:02 编辑
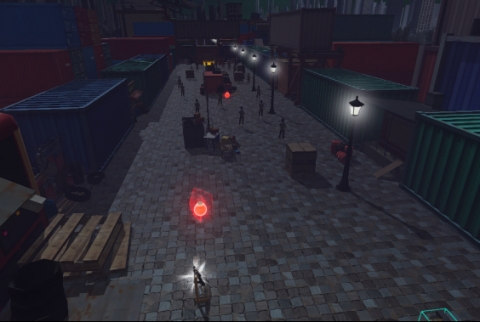
先看VCR
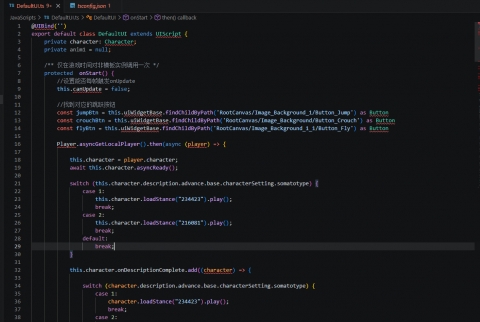
利用以下脚本,再修改一些简单的代码就可以创作属于你自己的射击游戏了~
[单脚本][MyClearRandomWarps] 好用的随机/定向传送管理 - 资源/心得分享 创作者论坛
[单脚本][MyClearGuns] 开箱即用的枪械编辑器 - 资源/心得分享 创作者论坛
[单脚本][MyClearHP] 简易的血条系统 包含伤害死亡重生逻辑 - 资源/心得分享 创作者论坛
[单脚本][MyClearCamp] 简易的阵营管理系统 - 资源/心得分享 创作者论坛

帖子比较长,跟着做就能做出自己的射击游戏来,如果不想等的话直接跳最后下载工程体验一下~
1. 准备地图
1.1 大厅复活点
大厅复活点是玩家刚进入服务器、死亡后复活的地方
在这里可以给刚进服务器的玩家分配阵营、给复活的玩家发放武器、随机传送到作战区等处理

1.2 战场作战区
作战区是玩家直接交火的地带,地图设计需考虑点位平衡
如果不太会平衡地图,做成对称且近似正方形会比较好
需在地图里加入一些标志物,方便玩家根据标识物定位自己
地图场景中也要合理摆放一些掩体、障碍物等

1.3 设置随机战场复活点
下载导入单脚本传送管理,或者自己写逻辑
[单脚本][MyClearRandomWarps] 好用的随机/定向传送管理 - 资源/心得分享 创作者论坛
复活点尽量避开大家能随意架住的枪械,且场景内要有足够多的复活点
在大厅复活点放一个触发器,触发器底下挂一个脚本 EnterWar
触发器调用 MyClearRandomWarps.instance.ServerWarpPlayer(Char.player, "复活点"); 进行随机传送战场复活点

import MyClearRandomWarps from "./MyClearRandomWarps";

@Core.Class

export default class EnterWar extends Core.Script {

    /** 当脚本被实例后,会在第一帧更新前调用此函数 */

    protected onStart(): void {

        // 获取当前脚本挂载的触发器

        const MyTrigger = this.gameObject as Gameplay.Trigger;

        // 当玩家角色进入触发器

        MyTrigger.onEnter.add((Char: Gameplay.Character) => {

            // 建议有移动相关的触发器在客户端检测玩家

            if (SystemUtil.isClient()) {

                // 检测是否为当前客户端玩家

                if (Char == Gameplay.getCurrentPlayer().character) {

                    // 然后向服务器发送事件 EnterWar

                    Events.dispatchToServer("EnterWar");

                }

            }

        })

        // 如果为服务器

        if (SystemUtil.isServer()) {

            // 添加***,监听EnterWar事件

            Events.addClientListener("EnterWar", (player: Gameplay.Player) => {

                // 将玩家传送到战场随机复活点

                MyClearRandomWarps.instance.ServerWarpPlayer(player, "复活点");

            })

        }

    }

}

顺手把基地复活点也打上“传送点”的tag方便死亡后拉回这里

2. 接入枪械系统
2.1 制作枪械
下载导入单脚本枪械编辑器,或者自己写逻辑
[单脚本][MyClearGuns] 开箱即用的枪械编辑器 - 资源/心得分享 创作者论坛
这里提供几把简单的枪械{"GunName":"scar-L","GunGUID":"43712","GunLoc":"4|0|0","GunRot":"0|0|-25","GunScal":"0.8|0.8|0.8","GetGunAnime":"97180","GetGunSound":"20429|1|3|6","GetGunShowTime":0.5,"Range":40,"Projectil_Damage":30,"Projectil_Count":1,"Recoil_H":0.55,"Recoil_V":0.35,"Spread":0.02,"FullAuto":true,"ShootDelay":100,"ShootAnime":"80483","ShootSound":"12563|1|8|16","Ammo_CurNum":30,"Ammo_MaxInOne":30,"Ammo_CurPrepare":180,"Ammo_MaxPrepare":360,"ReloadDelay":2,"ReloadAnime":"33561","ReloadStartSound":"12525|1|3|6","ReloadOverSound":"12546|1|3|6"}
{"GunName":"AK12","GunGUID":"43704","GunLoc":"4|0|0","GunRot":"0|0|-30","GunScal":"0.8|0.8|0.8","GetGunAnime":"97180","GetGunSound":"20429|1|3|6","GetGunShowTime":0.5,"Range":44,"Projectil_Damage":35,"Projectil_Count":1,"Recoil_H":0.6,"Recoil_V":0.5,"Spread":0.03,"FullAuto":true,"ShootDelay":120,"ShootAnime":"80483","ShootSound":"25590|1|8|16","Ammo_CurNum":30,"Ammo_MaxInOne":30,"Ammo_CurPrepare":180,"Ammo_MaxPrepare":360,"ReloadDelay":2.5,"ReloadAnime":"33561","ReloadStartSound":"12525|1|3|6","ReloadOverSound":"12546|1|3|6"}
{"GunName":"mp7","GunGUID":"43736","GunLoc":"4|0|0","GunRot":"0|10|-25","GunScal":"0.8|0.8|0.8","GetGunAnime":"97180","GetGunSound":"20429|1|3|6","GetGunShowTime":0.5,"Range":32,"Projectil_Damage":25,"Projectil_Count":1,"Recoil_H":0.3,"Recoil_V":0.4,"Spread":0.02,"FullAuto":true,"ShootDelay":120,"ShootAnime":"80483","ShootSound":"25665|1|8|16","Ammo_CurNum":35,"Ammo_MaxInOne":35,"Ammo_CurPrepare":210,"Ammo_MaxPrepare":420,"ReloadDelay":1.5,"ReloadAnime":"49093","ReloadStartSound":"12525|1|3|6","ReloadOverSound":"12546|1|3|6"}
{"GunName":"VPD-215","GunGUID":"44984","GunLoc":"4|0|0","GunRot":"0|10|-25","GunScal":"0.8|0.8|0.8","GetGunAnime":"97180","GetGunSound":"20429|1|3|6","GetGunShowTime":0.5,"Range":20,"Projectil_Damage":30,"Projectil_Count":6,"Recoil_H":0.4,"Recoil_V":0.7,"Spread":0.4,"FullAuto":false,"ShootDelay":500,"ShootAnime":"80483","ShootSound":"12569|1|8|16","Ammo_CurNum":5,"Ammo_MaxInOne":5,"Ammo_CurPrepare":35,"Ammo_MaxPrepare":70,"ReloadDelay":2.5,"ReloadAnime":"80479","ReloadStartSound":"12525|1|3|6","ReloadOverSound":"12546|1|3|6"}
{"GunName":"m249","GunGUID":"43722","GunLoc":"4|0|0","GunRot":"0|0|-25","GunScal":"1|1|1","GetGunAnime":"97180","GetGunSound":"20429|1|3|6","GetGunShowTime":0.5,"Range":40,"Projectil_Damage":30,"Projectil_Count":1,"Recoil_H":0.5,"Recoil_V":0.6,"Spread":0.04,"FullAuto":true,"ShootDelay":110,"ShootAnime":"80483","ShootSound":"12592|1|8|16","Ammo_CurNum":60,"Ammo_MaxInOne":60,"Ammo_CurPrepare":240,"Ammo_MaxPrepare":480,"ReloadDelay":4,"ReloadAnime":"99960","ReloadStartSound":"12525|1|3|6","ReloadOverSound":"12546|1|3|6"}
{"GunName":"M700","GunGUID":"43728","GunLoc":"4|0|0","GunRot":"0|0|-35","GunScal":"0.8|0.8|0.8","GetGunAnime":"97180","GetGunSound":"20429|1|3|6","GetGunShowTime":0.5,"Range":52,"Projectil_Damage":80,"Projectil_Count":1,"Recoil_H":0.2,"Recoil_V":0.2,"Spread":0.015,"FullAuto":false,"ShootDelay":1300,"ShootAnime":"80483","ShootSound":"12569|1|8|16","Ammo_CurNum":5,"Ammo_MaxInOne":5,"Ammo_CurPrepare":25,"Ammo_MaxPrepare":50,"ReloadDelay":3.5,"ReloadAnime":"102367","ReloadStartSound":"12525|1|3|6","ReloadOverSound":"12546|1|3|6"}

2.2 获取枪械
在EnterWar脚本中发枪import MyClearGuns from "./MyClearGuns";
import MyClearRandomWarps from "./MyClearRandomWarps";
@Core.Class
export default class EnterWar extends Core.Script {
protected onStart(): void {
const MyTrigger = this.gameObject as Gameplay.Trigger;
MyTrigger.onEnter.add((Char: Gameplay.Character) => {
if (SystemUtil.isClient()) {
if (Char == Gameplay.getCurrentPlayer().character) {
Events.dispatchToServer("EnterWar");
}
}
})
if (SystemUtil.isServer()) {
Events.addClientListener("EnterWar", (player: Gameplay.Player) => {
MyClearRandomWarps.instance.ServerWarpPlayer(player, "复活点");
// 随机给玩家发一把枪
MyClearGuns.instance.ServerGiveRandomGun(player);
})
}
}
}
这样进入战区的时候就会随机从枪械列表中获取一把枪械了
但现在显然不能正常发射的,因为没有配套的UI
2.3 制作枪械UI
这里我们在工程内容自带的UIDefaul进行修改制作
2.3.1 添加准星
拖入图片控件,从资源库拖入准星图片,修改尺寸

工具栏使用具置工具,水平线居中,垂直线居中,让准星在ui中间

找到准星的属性面板,将对齐里的水平方向、垂直方向都改为中心对齐

这样无论玩家的屏幕是什么比例尺寸,这个准星将始终在屏幕中心位置
2.3.2 添加开火摇杆
移动开火按键到左侧,作为副开火键,更换图片,将对齐改为左下对齐

添加摇杆控件大小 350*250,Z系数修改为1,对齐改为右下

摇杆设置按如下调整

摇杆的底图换成 145612, 摇杆中心图片换成 98133
2.3.3 将互交按钮改为换弹按钮
换个图标就好了,然后简单调整一下按钮之间的位置,优化一下操作体验

2.3.4 添加弹药数量显示
拖入一个文本控件右下对齐,字体适当调大,水平显示改为不裁剪,可关闭自适应文本框简单加个描黑边,重命名,最后把Text改为空,默认显示为空

到这里,我们已经将基础的UIDefault的UI部分改成了一个射击游戏惯用的操作UI了
2.4 联动UI脚本
打开UIDefault.ts脚本,现在要在UIDefault
2.4.1 绑定开火
删除旧有的AttackBtn.onPressed里的内容,接入开火的方法新增onReleased方法,接入停火的方法找到开火摇杆,同样在对应的两个方法里加入开火、停火以下是这部分的代码const AttackBtn = this.uiWidgetBase.findChildByPath('RootCanvas/Button_Attack') as UI.Button
//按下副开火键,开始开火
AttackBtn.onPressed.add(() => {
MyClearGuns.instance.ClientStartShoot();
})
//松开副开火键,停止开火
AttackBtn.onReleased.add(() => {
MyClearGuns.instance.ClientStopShoot();
})
const AttackRod = this.uiWidgetBase.findChildByPath('RootCanvas/VirtualJoystickPanel_1') as UI.VirtualJoystickPanel
// 按下开火摇杆,开始开火
AttackRod.onJoyStickDown.add(()=>{
MyClearGuns.instance.ClientStartShoot();
})
// 松开开火摇杆,停止开火
AttackRod.onJoyStickUp.add(() => {
MyClearGuns.instance.ClientStopShoot();
})
运行游戏,进入战区,试着点击开火吧

2.4.2 绑定换弹
将InteractBtn.onPressed里的内容删除,调用换弹方法const InteractBtn = this.uiWidgetBase.findChildByPath('RootCanvas/Button_Interact') as UI.Button
// 点击交互按钮,进行换弹
InteractBtn.onPressed.add(() => {
MyClearGuns.instance.ClientReloadAmmo();
})
2.4.3 调整弹药数量显示
在UIDefault脚本里的onStart方法前后这样写/**弹药数显示文本框 */
public AmmoText: UI.TextBlock = undefined;
/**静态实例,用于其他地方调用 */
public static instance: UIDefault;
/** 仅在游戏时间对非模板实例调用一次 */
protected onStart() {
// 将这个静态实例指向自己,让其他地方能调到这里
UIDefault.instance = this;
// 找到并赋值弹药数显示文本框
this.AmmoText = this.uiWidgetBase.findChildByPath('RootCanvas/AmmoText') as UI.TextBlock;
这样就可以在其他C端脚本调用 UIDefault.instance.AmmoText.text 来修改子弹数的文本内容了使用 帖子 [单脚本][MyClearGuns] 开箱即用的枪械编辑器 - 资源/心得分享 创作者论坛 7.快速接入 里提到的方法,在子弹数改变的时候修改这个text,这里就需要进入MyClearGuns脚本里修改咯//----[事件]----//
/**纯客户端,成功拿到枪后调用,可以在这里改UI、摄像机属性 */
@Core.Function(Core.Client)
public onClientEquipedGun(player: Gameplay.Player) {
// 被下掉枪后要停止换弹状态
this.isReloading = false;
// 修改子弹数显示
UIDefault.instance.AmmoText.text = "弹药:" + this.CurrGunData.Ammo_CurNum + "/" + this.CurrGunData.Ammo_CurPrepare;
}
/**纯客户端,每批次射击完成时调用,不管半自动还是全自动,也不管子弹数,打一次射线就会掉一次,可以在这里接UI更新子弹数 */
public onClientOneShootComplete() {
// 修改子弹数显示
UIDefault.instance.AmmoText.text = "弹药:" + this.CurrGunData.Ammo_CurNum + "/" + this.CurrGunData.Ammo_CurPrepare;
}
/**纯客户端,每次成功换弹后调用,可以在这里接UI更新子弹数 */
public onClientReloadComplete() {
// 修改子弹数显示
UIDefault.instance.AmmoText.text = "弹药:" + this.CurrGunData.Ammo_CurNum + "/" + this.CurrGunData.Ammo_CurPrepare;
}
/**纯客户端,成功下掉枪后调用,可以在这里改UI、摄像机属性 */
@Core.Function(Core.Client)
public onClientRemovedGun(player: Gameplay.Player) {
// 被下掉枪后要停止换弹状态
this.isReloading = false;
// 被下掉枪后要停止开火
this.ClientStopShoot();
// 修改子弹数显示
UIDefault.instance.AmmoText.text = "";
}
到这一步,子弹数量也能正常更新了,枪械系统就算接入完成了
接完了枪械系统后,建议关闭MyClearGuns的编辑状态哦!

3. 接入血量系统
下载导入血量系统[单脚本][MyClearHP] 简易的血条系统 包含伤害死亡重生逻辑 - 资源/心得分享 创作者论坛
或者接入你自己的血量系统
3.1 接入扣血机制
找到MyClearGuns的 ServerDamageChar 方法,在打log的下方加入扣血MyClearHP的扣血方法/**服务器处理伤害,这个逻辑要你自己加哦
* @param attacker 攻击者guid
* @param victim 受害者guid
* @param damege 造成的伤害
* @param HeadShot 是否爆头,不带参数视为不爆头
*/
@Core.Function(Core.Server)
public ServerDamageChar(attacker: string, victim: string, damege: number, HeadShot?: boolean) {
let victimChar = Core.GameObject.find(victim) as Gameplay.Character;
// 判断攻击者此时有没有枪
Core.GameObject.asyncFind(attacker).then((obj) => {
const attackerChar = obj as Gameplay.Character
if (this.Players_GunName.get(attackerChar.player) != undefined) {
// 判断此刻玩家手里的枪的伤害是否正常
if (this.GunName_GunData.get(this.Players_GunName.get(attackerChar.player)).Projectil_Damage != damege) {
damege = this.GunName_GunData.get(this.Players_GunName.get(attackerChar.player)).Projectil_Damage;
}
console.log("[MCG] " + attackerChar.characterName + " 击中了 " + victimChar.characterName + ",造成: " + damege + "点伤害,是否爆头: " + HeadShot);
// 这里调用MyClearHP的扣血方法
MyClearHP.instance.ServerChangePlayerCurHP(attackerChar.player, victimChar.player, -1 * damege);
}
else {
// 攻击者没枪但是能造成伤害,可能卡了,没有成功下掉他的枪
// 那就再下一次
console.log("攻击者没枪但是能造成伤害,可能卡了,没有成功下掉他的枪");
this.ServerDelGun(attackerChar.player);
}
})
}
这样击中敌对状态的人就会扣血,死亡,但是死亡后还在原地复活,这不符合正常游戏逻辑

3.2 接入死亡复活机制
在MyClearHP找到当玩家死亡onPlayerDeath方法,这里处理被击败后的玩家的枪
你可以在这里修改重生需要的事件,或者在这里添加击杀播报、或者添加被击败的效果之类的
并且在当玩家重生onPlayerRespawn方法里,加入传送到起点
以下是添加后的代码/** 当玩家死亡
* @effect 仅服务端
* @param Attacker 攻击者
* @param Victim 受害者
*/
public onPlayerDeath(Attacker: Gameplay.Player, Victim: Gameplay.Player) {
if (SystemUtil.isServer()) {
Victim.character.ragdollEnable = true;
// 被击杀了是吧~ 除你武器!
MyClearGuns.instance.ServerDelGun(Victim);
// 3s后自动重生
setTimeout(() => {
this.onPlayerRespawn(Attacker, Victim);
}, 3000);
}
}
/** 当玩家重生
* @effect 仅服务端
* @param Attacker 攻击者
* @param Victim 受害者
*/
public onPlayerRespawn(Attacker: Gameplay.Player, Victim: Gameplay.Player) {
if (SystemUtil.isServer()) {
MyClearRandomWarps.instance.ServerWarpPlayer(Victim, "基地")
Victim.character.ragdollEnable = false;
const VictimPID = Victim.getUserId();
let PPhp = this.PID_hp_Map.get(VictimPID);
PPhp.curHP = PPhp.MaxHp;
this.PID_hp_Map.set(VictimPID, PPhp);
this.SyncPID_hp_Map();
}
}
这样被击杀后就会去除武器,并且遣返回出生点

3.3 调整自己的血条显示
细心的往右可能发现了,屏幕准星的位置有自己的血条在,看着有些挡
3.3.1 关闭自己头顶的血条
MyClearHP里找到 ifShowMyUI ,改为false
3.3.2 设计自己的血条显示
依旧是魔改我们的UIDefault的UI拖入进度条,调整大小,放到合适的位置,改为中下对齐,把滑动按钮的绘制类型改为“无”,调整到喜欢的样式当然你也可以再拖一个文本框在血条上显示具体血量,做法和弹药的类似,对齐方式记得改为中下对齐简单做了一下,大概像这样

3.3.3 联动UI脚本
UIDefault.ts里要去找到并且po出新增的这两个控件,代码如下/**弹药数显示文本框 */
public AmmoText: UI.TextBlock = undefined;
/**血量数显示文本框 */
public HPText: UI.TextBlock = undefined;
/**血条进度条 */
public HPBar: UI.ProgressBar = undefined;
/**静态实例,用于其他地方调用 */
public static instance: UIDefault;
/** 仅在游戏时间对非模板实例调用一次 */
protected onStart() {
// 将这个静态实例指向自己,让其他地方能调到这里
UIDefault.instance = this;
// 找到并赋值弹药数显示文本框
this.AmmoText = this.uiWidgetBase.findChildByPath('RootCanvas/AmmoText') as UI.TextBlock;
// 找到并赋值血量显示文本框
this.HPText = this.uiWidgetBase.findChildByPath('RootCanvas/HPText') as UI.TextBlock;
// 找到并赋值血条进度条
this.HPBar = this.uiWidgetBase.findChildByPath('RootCanvas/HPBar') as UI.ProgressBar;
这样就可以修改用弹药显示的方法去修改自己的血量了
进入MyClearHP 找到onMyPlayerChangeHP方法,当自己血量改变时会调用这个方法
在这里去调用我们刚才po出的UI里面的东西就好了
/** 当前客户端的玩家血量改变,这里可以对你别的UI做操作

     * @effect 仅客户端

     * @param curHP 当前客户端玩家的当前血量

     * @param MaxHp 当前客户端玩家的最大血量

     */

    public onMyPlayerChangeHP(curHP: number, MaxHp: number) {

        // 当前客户端的玩家血量改变,这里可以对你的UI做操作

        // 在这写你的操作,如血量改变、死亡黑屏等

        UIDefault.instance.HPBar.percent = curHP / MaxHp;

        UIDefault.instance.HPText.text = Math.floor(curHP) + "/" + Math.round(MaxHp);

    }
效果如下,受击时会改变自己的血条,复活时也会回满自己的血条

4. 接入阵营系统
如果你的游戏是单挑王之类的游戏,需要在MyClearHP、MyClearGuns这两个脚本的isFriendly中
都返回false就好了,这样你看谁都是敌人,谁都可以打
但如果你需要有两边阵营对打的话,就需要接入MyClearCamp阵营系统
[单脚本][MyClearCamp] 简易的阵营管理系统 - 资源/心得分享 创作者论坛
下载并导入该脚本
4.1 随机分配阵营处理
找到MyClearCamp的onPlayerJoin方法,这里默认是PlayerJoinWeakCamp也就是说当玩家进游戏的时候,默认会加入人少的那个队伍
4.1 敌我关系挂钩
在MyClearHP、MyClearGuns这两个脚本的isFriendly中加入MyClearCamp相关判定逻辑!需注意! 一定要反复检查传入的playerid,这些一定要统一,否则会出错
MyClearHP/**通过两个id判断是否为友军,这个逻辑要你自己写哦 */
public isFriendly(PlayerID1: string, PlayerID2: string): boolean {
// 这里写你的逻辑
return MyClearCamp.instance.isFriendly(PlayerID1, PlayerID2);
}
MyClearGuns
1. 修改lineTrace里的 if (!this.isFriendly(p.character.guid, v.gameObject.guid)){ 为if (!this.isFriendly(p.getUserId(), v.gameObject.player.getUserId())) {
2. 然后/**通过两个id判断是否为友军,这个逻辑要你自己写哦 */
public isFriendly(PlayerID1: string, PlayerID2: string): boolean {
// 这里写你的逻辑
return MyClearCamp.instance.isFriendly(PlayerID1, PlayerID2);
}
这样就可以有阵营,关闭友伤

5. 工程文件
 MyFirstTPS1.zip
(372.35 KB, 下载次数: 922)
MyFirstTPS1.zip
(372.35 KB, 下载次数: 922)
|


 默默偷走脚本
 都是公开的瓜 今天串起来了 嘿嘿~ 有时间可以试试啦!